With the crowdfunding plugin installed, every wishlist comes with a wallet for storing money that can be used on wishlist items. The wallet has zero amount in it by default.
Money can be transferred to the wallet in various ways. These are by sending the amount received for purchased items to it, sending contributions received for crowdfunded items to it, and by sending free contributions received for the wishlist to it.
The process of transferring the money is very straightforward, let’s see how it is done.
Sending money received for a normal wishlist item or a crowdfunded item to the wallet
Money received for normal items in a wishlist come from direct purchases of the items from the checkout page whereas money received for crowdfunded items in the wishlist come in the form of contributions to the items from the checkout page. However both monies can be transferred to the wallet in the same way.
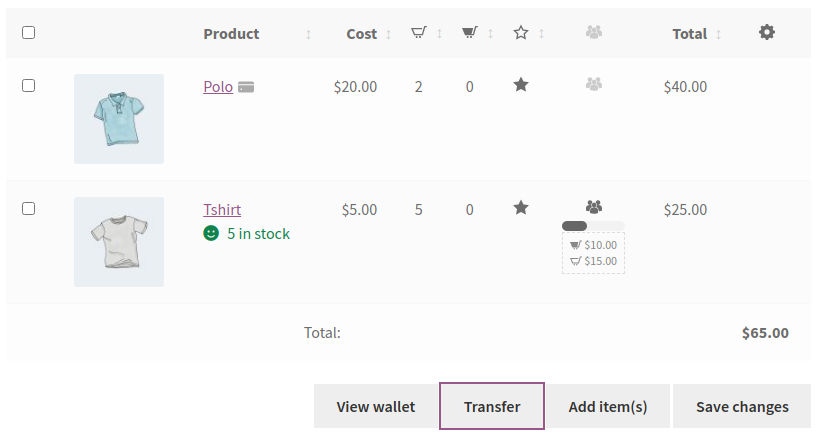
To send money received for a normal wishlist item or crowdfunded item to the wallet, click on the “Transfer” button at the bottom of the wishlist items table.

Then on the table locate the item for which you want to send the amount received to the wallet and click on the first credit card icon on the last column of the row containing this item.

After confirming that you want to send the amount received to the wallet, the amount would be debited from the item’s account and credited to the wallet.
Please note that you can only send all the amount received for an item to the wallet. You cannot send part of it. Also once this amount has been sent to the wallet, the item can no longer receive direct purchases or crowdfund contributions from customers, it can only be funded from the wallet.
For this reason, sending amounts received for normal or crowdfunded items to the wallet should only be done at the end of the wishlist campaign as part of the process of helping the wishlist get fulfilled.
Sending free contributions to the wallet
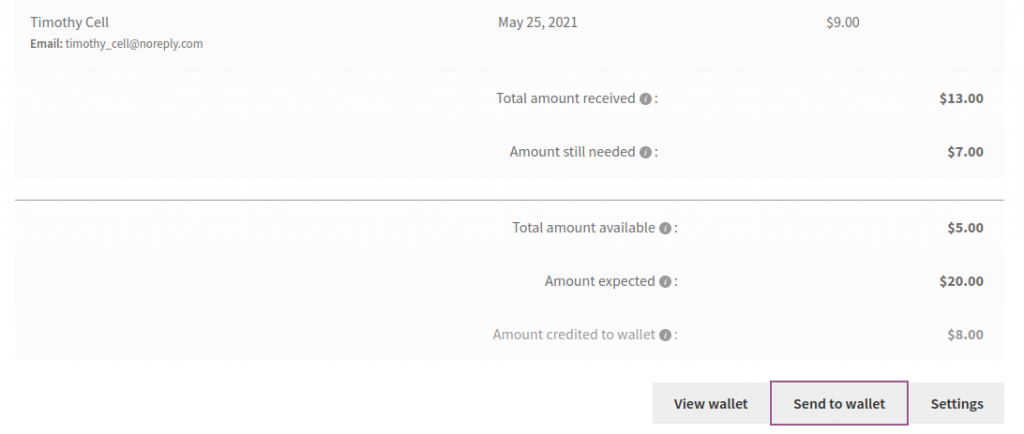
To send money received in free contributions to the wallet, click the “Send to wallet” button at the bottom of the free contributions table.

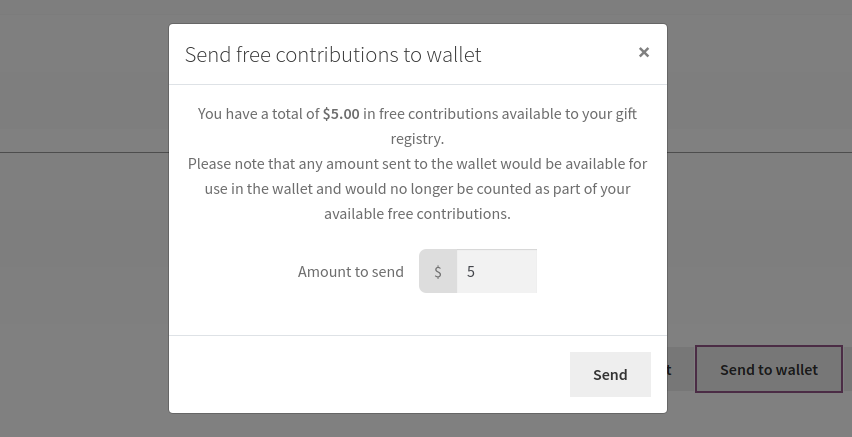
A dialog would then appear allowing you to choose the amount of free contributions you want to send. Of course you cannot choose an amount greater than the total free contributions you have received. After choosing the amount, click the “Send” button in the dialog and the amount should be transferred to the wallet.
